Today in this article, we will see how to Azure DevOps – Copy Secured file artifacts in the CI-CD build pipeline.
You may find a need to access any secured JSON file in your release folder so that applications can use it securely for any additional cross-reference usage.
For such a secured file since you can not commit to the repository directly, you may want to check the best possible way to use them in the application runtime.
Today in this article, we will cover below aspects,
You could use the approach to install a certificate or Use a file to access any token or credentials for additional usage cases like Authentication etc.
Azure Copy Secured file to artifact folder
Step 1 – Upload the secured file
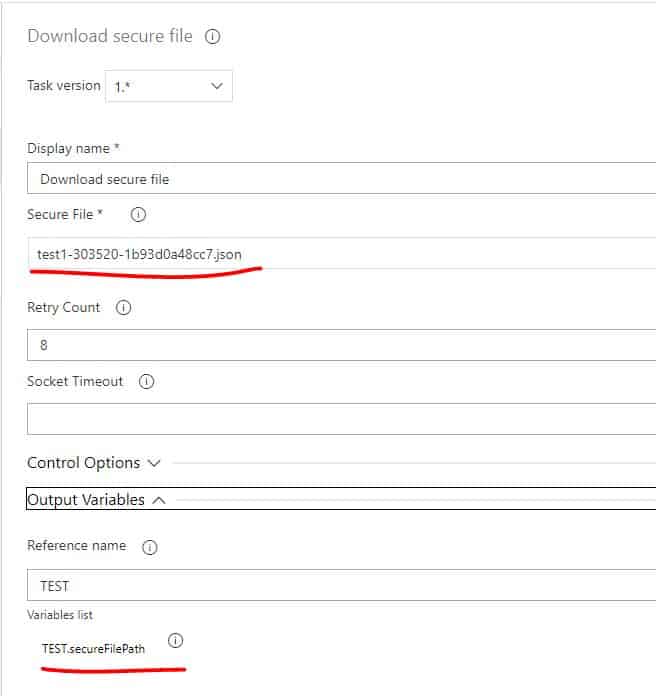
Add the secured file download task to your pipeline and upload the file.
For example, I have uploaded a secured file with the name “test1-303520-1b93d0a48cc7.json” to be downloaded as a part of the task

As you can see the variable file path is “TEST.secureFilePath”
Step 2- Define Source and Target folder configuration
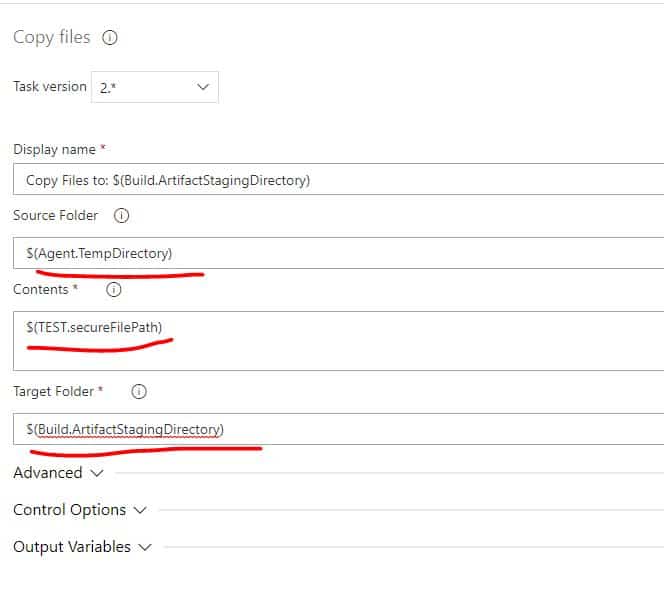
The secured file downloaded will be available in the directory called $(Agent.TempDirectory).
As highlighted above secured file path can be referenced as $(TEST.secureFilePath)
Let’s add another Copy File task as shown below,

That’s all once you build the pipeline, you will see the file is copied to artifacts so that you can consume it for any specific requirements,

References :
Do you have any comments or ideas or any better suggestions to share?
Please sound off your comments below.
Happy Coding !!
Please bookmark this page and share it with your friends. Please Subscribe to the blog to receive notifications on freshly published(2024) best practices and guidelines for software design and development.