Angular – JWT Authentication using HTTPClient Examples
In the last article, we already performed and followed the below steps which set up the prerequisites for using HttpClient in the Angular application. Today in this article, we shall learn how to use Angular – JWT Authentication using HTTPClient Examples
- Create a LoginComponent
- Add Service ex. EmployeeService to LoginComponent
- Add HttpClient service to EmployeeService
- Adding GET, POST Delete
Today in this article, we will cover below aspects,
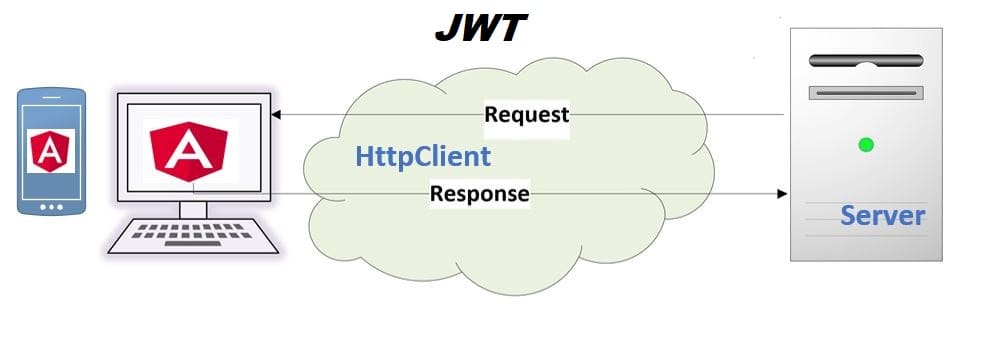
We shall now extend the previous article for HttpClient to invoke Http POST calls from Angular application using JWT Authentication.
Using JWT authentication means all about passing the JWT header from the client code to authenticate the user.
There are many techniques of implementing this particular requirement depending on each use case. Today in this article we will see simply how to configure the Angular HTTP request using JWT authentication.
Reference:
Define Http Content-type Header
JSON Web Token( JWT) is an open standard used for securely transmitting information between parties as a JSON object. JSON Web Tokens are very useful for various scenarios like authorization purposes or Information exchange using digitally signed key-value pairs.
Please define HttpHeaders to be used for JWT bearer token as below,
We shall be using below sample JWT token in the example,
eyJhbGciOiJIUzI1NiIsInR5cCI6IkpXVCJ9.
eyJleHAiOjE1OTU0NzE5MjMsImlzcyI6Imh0dHBzOi8vbG9jYWxob3N0OjQ0MzQxIiwiYXVkIjoiaHR0cHM6Ly9sb2NhbGhvc3Q6NDQzNDEifQ.
FdHX7Ycs_Z5zwAQkRD9iyVRPsgS42QqC8yQ9EKYnVC4
The client should send Authorization header with Bearer schema as below.
Authorization: Bearer <token>
Define HttpHeader in Angular using JWT
Let’s define HttpHeaders to be used for JWT bearer token as below,
Example
httpOptions = {
    headers: new HttpHeaders({ 'Content-Type': 'application/json',
    'Authorization': 'Bearer eyJhbGciOiJIUzI1NiIsInR5cCI6IkpXVCJ9.eyJleHAiOjE1OTU0NzE5MjMsImlzcyI6Imh0dHBzOi8vbG9jYWxob3N0OjQ0MzQxIiwiYXVkIjoiaHR0cHM6Ly9sb2NhbGhvc3Q6NDQzNDEifQ.FdHX7Ycs_Z5zwAQkRD9iyVRPsgS42QqC8yQ9EKYnVC4' })
  };
Lets pass above defined HttpHeaders object as 3rd argument to POST method as below,
File: account.service.ts
 addEmployee(emp: Employee): Observable<Employee> {
    return this.http.post<Employee>(this.apiUrl, emp, this.httpOptions).pipe(
      tap((emp: Employee) => this.log(`added emp = ${emp.Id}`)),
      catchError(this.handleError<Employee>('addHero'))
    );
  }
File: login.component.ts
 AddNewEmployee(Id: string): void {
    if (!Id) { return; }
    this.accountService.addEmployee({ Id } as Employee)
      .subscribe(emp => {
        this.emp = emp;
      });
  }
Connecting API/Service endpoint
You can now ready to connect to any REST API endpoint.
I already have below API endpoint which we shall be returning as Employee model (which we have defined as Observable above in getEmployees())
I am using ASP.NET Core API below which is secured using the JWT Authentication scheme.
Let’s use the below Url for now to connect to REST API while calling POST,
        [HttpPost]
        [Authorize]
        public ActionResult<Employee> Post([FromBody] Employee value)
        {
            //Add Employee to Database
            CreateNewEmployee(value);

            return Ok(value);
        }
Please note your Server should allow CORS request from your Angular UI domain. Please visit for more details: How to Enable CORS in ASP.NET Core REST API
Once the CORS is enabled on your server-side, you shall see the POST method hits your API and gives your required response.
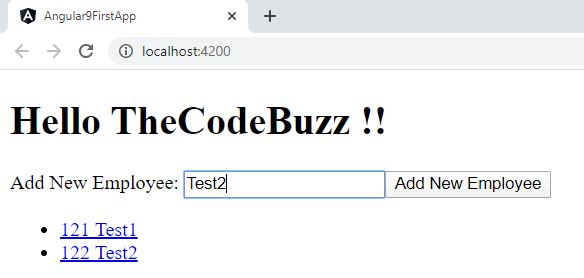
Here is the html defined for LoginComponent ,
File: login.component.html
<h1>Hello TheCodeBuzz !! </h1>

<div>
  <label>Add New Employee:
    <input #empName />
  </label>
  <button (click)="AddNewEmployee(empName.value); empName.value=''">
    Add New Employee
  </button>
</div>
Finally , you could see the result on the browser,
Additional details:
If you haven’t done already you need to update HttpClient in NgModule so that to be able to use anywhere in your application.
Add HttpClient to Service
Make HttpClient available in the app in two steps as explained below,
DI HttpClient using Constructor Injection
To use HttpClient , you need to import below,
import { HttpClient, HttpHeaders } from '@angular/common/http';
Add HttpClient to EmployeeService using Constructor injections as below,
Here below is the complete code,
File:account.service.ts
import { Injectable } from '@angular/core';
import { HttpClient, HttpHeaders } from '@angular/common/http';
import { Observable, of } from 'rxjs';
import { catchError, map, tap } from 'rxjs/operators';
import { Employee } from './employee';

@Injectable({
  providedIn: 'root'
})
export class AccountService {

  private apiUrl = '/api/values';


  constructor(private http: HttpClient) { }
}
Register HttpClientModule in root Module as below,
..
..
import { HttpClientModule } from '@angular/common/http';

@NgModule({
  declarations: [
    AppComponent,
    LoginComponent
  ],
  imports: [
    BrowserModule,
    AppRoutingModule,
    HttpClientModule
  ],
  providers: [LoggerService,AccountService],
  bootstrap: [AppComponent]
})
export class AppModule { }
Do you have any comments or ideas or any better suggestions to share?
Please sound off your comments below.
Happy Coding !!
Additional reference
Summary
Today in this article we learned how to send secured JWT bearer HTTP Client calls from Angular UI to backend secured service using simple and easy to understand examples.
Please bookmark this page and share it with your friends. Please Subscribe to the blog to receive notifications on freshly published (2025) best practices and guidelines for software design and development.
