Secure secrets using Azure KeyVault with examples

Today in this article, we will see how to Secure secrets using Azure KeyVault with examples. We will see step-by-step detailed examples of how to secure and use secretes using the KeyVault service.
Today in this article, we will cover below aspects,
- Secure secrets using Azure KeyVault – Getting Started
- Prerequisites
- Azure Key Vault Service Setup
- Create Azure Key Vault service using Azure Portal
- Define configuration of KeyVault
- Add Access policy using Managed Identity for Azure KeyVault
- Add Secretes to KeyVault
- Using Azure CLI for adding Managed Identity for the KeyVault service
- Create ASP.NET Core API or MVC application using .NET 6 or .NET 5
We will see how to use Managed identity for accessing Azure Key vault resources and will also cover how to access Azure key vault resources without using the Managed identity.
We will use Azure portal and Azure CLI commands both ways to achieve the same.
In this tutorial, we will deploy the web application to Azure App Service. We will use the Azure Key Vault secret client library for .NET and the Azure CLI.
Managed identity let you authenticate to any service inlcuding Key Vault that supports Azure AD authentication.
Also You need not have to store keys or secretes in the code.
You’ll use a managed identity to authenticate your Azure web app with an Azure key vault using
Azure KeyVault service is language agnostics (like any other Azure services offered) and can be used for .NET, JAVA, Node JS, and Python application as required.
Below discussed high-level steps can be followed in any language of your choice.
We will use a simple .NET API which will connect to Azure Vault to get the secured credentials like Connection string etc.
KeyVault lets you securely access secretes and sensitive information from within your applications. These Keys, secrets, and certificates are protected without you having to write the code yourself, and you can easily use them from your applications.
Authentication in Key Vault works using Azure Active Directory (Azure AD) where, Azure AD authenticates the identity of any given security principal.
Before we get started we will perform the basic configuration required for the Azure Key Vault service to function properly.
We will use a simple application that we will be hosting in Azure Cloud. This application will use the Vault to get the sensitive credentials.
Secure secrets using Azure KeyVault – Getting Started
Prerequisites
Before we get started with actual Azure Vault implementation please make sure you have the below prerequisites defined already in your Azure cloud account,
- Create a Resource group( if not already exist )
- Create an App Service plan
- Create Azure WebApp (App Service) in the App service plan
Azure Key Vault Service Setup
We can set up the Azure Key Vault service using multiple approaches.
We will mainly see two approaches i.e using Azure CLI and Azure Portal in this article
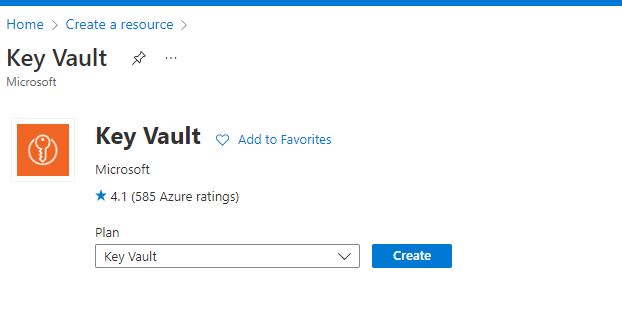
Create Azure Key Vault service using Azure Portal
Define configuration of KeyVault

Add Access policy using Managed Identity for Azure KeyVault
Please define the access policy as required for the vault service.

- Above I have defined only “Get” access to key vault service.
- For the “Select Principal” option, select the Azure Web App that you enabled Identity Management previously.
Once done your Vault account will be created successfully
Below highlighted URL is your AzureKy Vault URL.
Please make a note of Vault URI “https://thecodebuzz-key-vault.vault.azure.net/” this is going to be used on the C# logic to connect to Vault and fetch the secretes. We will see more on the same in the below section.
Add Secretes to KeyVault
Let’s now go to our Key Vault and add application secrete,
Above I have added new secretes called “YourSecreteCode” with a value of “you are beautiful“
Using Azure CLI for adding Managed Identity for the KeyVault service
Alternatively, If interested we can perform the above steps using CLI as well.
One can use the AZ CLI command to create an Azure Key Vault service account as below,
The below command can be used to create an Azure Key Vault account.
Command
az keyvault create --resource-group "thecodebuzz-group" --name "thecodebuzz-vault"
assign-identity command to create the identity for this application
Command
az webapp identity assign --name "<App-Service-Name>" --resource-group "<Resource-Group-Name>"
Example
az webapp identity assign --name "thecodebuzz-web-app-service" --resource-group "thecodebuzz-group"
Once executed successfully,
You shall see the output below,
{
   "principalId": "4a6bdc47-xxx-4402-xxxx-fc2861108d1c",
   "tenantId": "xxxxxxxx-xxxx-xxxx-xxxx-xxxxxxxxxxxx",
   "type": "SystemAssigned"
 }
As a next step, please run the below command to set the policy.
- The web app application is given permission to do get or list operations on your key vault bypassing the principalID obtained above
Command
az keyvault set-policy --name '<key-Vault-Name>' --object-id <principalId> --secret-permissions get
Example
az keyvault set-policy --name 'thecodebuzz-key-vault' --object-id '4a6bdc47-xxxx-4402-xxxx-fc2861108d1c' secret-permissions get
Create ASP.NET Core API or MVC application using .NET 6 or .NET 5
Let’s create our sample application here. Our target will be to deploy the application cloud Azure app service associated with App Service Plan.
Add below two Nuget packages,
Install-Package Azure.Security.KeyVault.Secrets -Version 4.3.0
This library allows you to securely store and control access to tokens, passwords, API keys, and other secrets. This library offers operations to create, retrieve, update, delete, purge, backup, restore, and list the secrets and their versions.
and
Install-Package Azure.Identity -Version 1.6.0
This library provides Azure Active Directory token authentication support.
Please add below using namespaces,
using Azure.Identity;

using Azure.Security.KeyVault.Secrets;
You can use the same logic as it is Console/API or other type of Application as well
Open your project solution in Visual Studio. Go to Program.cs and add the below-highlighted code
public class Program
    {
        public static void Main(string[] args)
        {
            CreateHostBuilder(args).Build().Run();
        }

        public static IHostBuilder CreateHostBuilder(string[] args) =>
            Host.CreateDefaultBuilder(args)
            .ConfigureAppConfiguration((context, config) =>
            {
                var settings = config.Build();

                if (!context.HostingEnvironment.IsDevelopment())
                {
                    var keyVaultEndpoint = settings["VaultURI"];
                    if (!string.IsNullOrEmpty(keyVaultEndpoint))
                    {
                        var azureServiceTokenProvider = new AzureServiceTokenProvider();
                        var keyVaultClient = new KeyVaultClient(new KeyVaultClient.AuthenticationCallback(azureServiceTokenProvider.KeyVaultTokenCallback));
                        config.AddAzureKeyVault(keyVaultEndpoint, keyVaultClient, new DefaultKeyVaultSecretManager());
                    }
                }

            }).ConfigureWebHostDefaults(webBuilder =>
               {
                   webBuilder.UseStartup<Startup>();
               });
    }
That’s all. Now Azure Key Vault credentials will become part of your IConfiguration root object along with all available configurations.
The above steps will help you manage the azure credentials just like any other configuration and hence let you handle updates or edits to key vault secrets based on how you set your configuration in the API or Application pipeline.
For Accessing Azure Key Vault credentials you need to inject the IConfiguration interface in the required module of your choice.
Example
 public IActionResult Index()
        {

            string keyVaultUrl = _configuration["YourSecreteCode"];

            return Ok("Your Secrete is -" + keyVaultUrl);
        }
Similarly, if you hit the WebApp endpoint,
If you are interested to know non-msi approach by using enviornment variable setup , please visit below article- Secure secrets using Azure KeyVault -Approach II
Other references :
Do you have any comments or ideas or any better suggestions to share?
Please sound off your comments below.
Happy Coding !!
Please bookmark this page and share it with your friends. Please Subscribe to the blog to receive notifications on freshly published (2025) best practices and guidelines for software design and development.